

Blue Raspberry Ice Cream Cake Roll

What fun colors for a fruity, ice cream treat, that’s as impressive as it is delicious!
"Roll, roll, roll your cake, gently....to create a perfect wrap for ice creams, puddings, berries and cream. In fact, this is something of a family-size ice cream wrap! Once you've mastered the trick of rolling and not freaking out at a crack or two, this is an easy dessert that is yet unique enough to dazzle your guests. "Mother knows best" and filled her cake with ice cream, sauced with hot fudge and crowned with sweetened whipped cream. There are as many twists to this recipe as there are creative mind. This particular one is suited to summer berries and birthday parties!
Based on the jelly roll that was popular in my mother's mother's day, progressive and savvy cooks have since improved it, though jelly might still woo an appetite or two!
Things I wish my mother told me:
-Line rimmed cookie sheet with parchment paper and spray with cooking spray to ease the releasing of the cake from the pan
-Place a rolling pin sprayed with cooking spray on the long edge of the cake and roll the cake and paper around it. Let sit 10 minutes or until ready to fill.
-You may need to use cans or heavy pans to prop cake to stay in rolled position until it cools.
BLUE RASPBERRY ICE CREAM CAKE ROLL
1 1/3 cup flour 4 eggs 1 1/3 cup sugar 1 1/2 teaspoons baking powder 1/3 cup vegetable oil 1/3 cup water 1 teaspoon salt 1 1/2 teaspoons vanilla extract 1/4 teaspoon blue or light blue gel food coloring 1/2 - 3/4 gallons rich, good-quality vanilla ice cream 1/2 gallon good-quality strawberry ice cream bit of red gel food coloring 1 cup raspberry preserves squirt of lemon juice 1/2 cup fresh raspberries for garnish dusting of powdered sugar
FOR CAKE LAYER:
-Heat oven to 375 degrees. Line a 15 X 10 inch cookie sheet with aluminum foil, parchment paper or waxed paper; lightly greased or sprayed with cooking spray.
-Stir together flour, baking powder, and salt; set aside.
-In mixing bowl, beat eggs about 5 minutes until very thick and lemon-colored. While mixing on medium speed, gradually add sugar. On low speed, blend in water, oil and vanilla. Gradually add flour mixture, beating on low speed, just until batter is smooth. Add and stir in blue dye until you have reached a vibrant raspberry blue shade. Pour into prepared pan, spreading batter to edges.
-Bake 12 to 15 minutes or until wooden pick inserted in center comes out clean. Remove cake from oven and let cool about 10 minutes.
-Loosen cake from edges of pan; invert onto cotton tea towel or waxed or parchment paper, sprinkled with powdered sugar. Carefully remove foil or paper from the bottom of cake and trim off stiff, brittle edges if necessary.
-Let sit 10 minutes then roll cake and towel/paper from long end. (or roll cake and paper around rolling pin to give it support.) Let cool completely.
FOR ICE CREAM LAYER:
-Let ice cream soften on counter top for 15 - 20 minutes. Spoon ice cream into a large mixing bowl. Stir and let rest for 5 minutes. Continue this process until the ice cream has melted to the consistency of a thick pudding and is smooth. (Don’t overstir to a liquid state. As soon as the ice cream is spreadable, stop, so that ice crystals won’t form as the ice cream refreezes.)
-Spoon ice cream onto cooled cake and with a spatula or back of a large spoon, spread the softened ice cream to within one inch of the edges of the cake, as evenly as possible.
-Place in freezer for no more than 20 minutes while preparing the next ice cream filling.
-Soften strawberry ice cream as described above, adding red gel food coloring a bit at a time to intensify the colors to a rich raspberry shade.
-Remove the cake from the freezer and mound the strawberry ice cream on top of the vanilla ice cream, down one long edge of the cake roll. Working quickly, gently pick up one long edge of the cake roll, with the paper or foil lining to support it, and roll the cake away from you, up and over the ice cream fillings to enclose them, removing the paper as you roll the cake. Roll as tightly as possible, without squeezing so hard that the ice cream starts to ooze out.
-Wrap the paper back over the rolled cake firmly to secure the roll and immediately place in the freezer for 2 hours. At that point, you can remove the cake roll from the freezer and press to re-shape and create a nicer rolled shape. Return to the freezer and let freeze at least 6 hours to overnight before serving.
TO SERVE:
-In a small saucepan, heat raspberry preserves just a bit over low heat. Add water and stir in to create a loose puree texture. Add a squirt of lemon juice and set in refrigerator to chill.
-Remove cake roll from freezer and unwrap from paper. Trim the ends by slicing off about 1/2 inch of the cake and ice cream on each end so that you can see the swirls of the cake and ice cream. Lightly dust cake roll with powdered sugar.
-Place on a long serving tray, sprinkle lightly with powdered sugar and serve immediately, cutting the roll into 1 1/2 inch slices. Spoon the chilled raspberry puree over each piece and garnish with a fresh raspberry or two.
-Makes 10 servings.
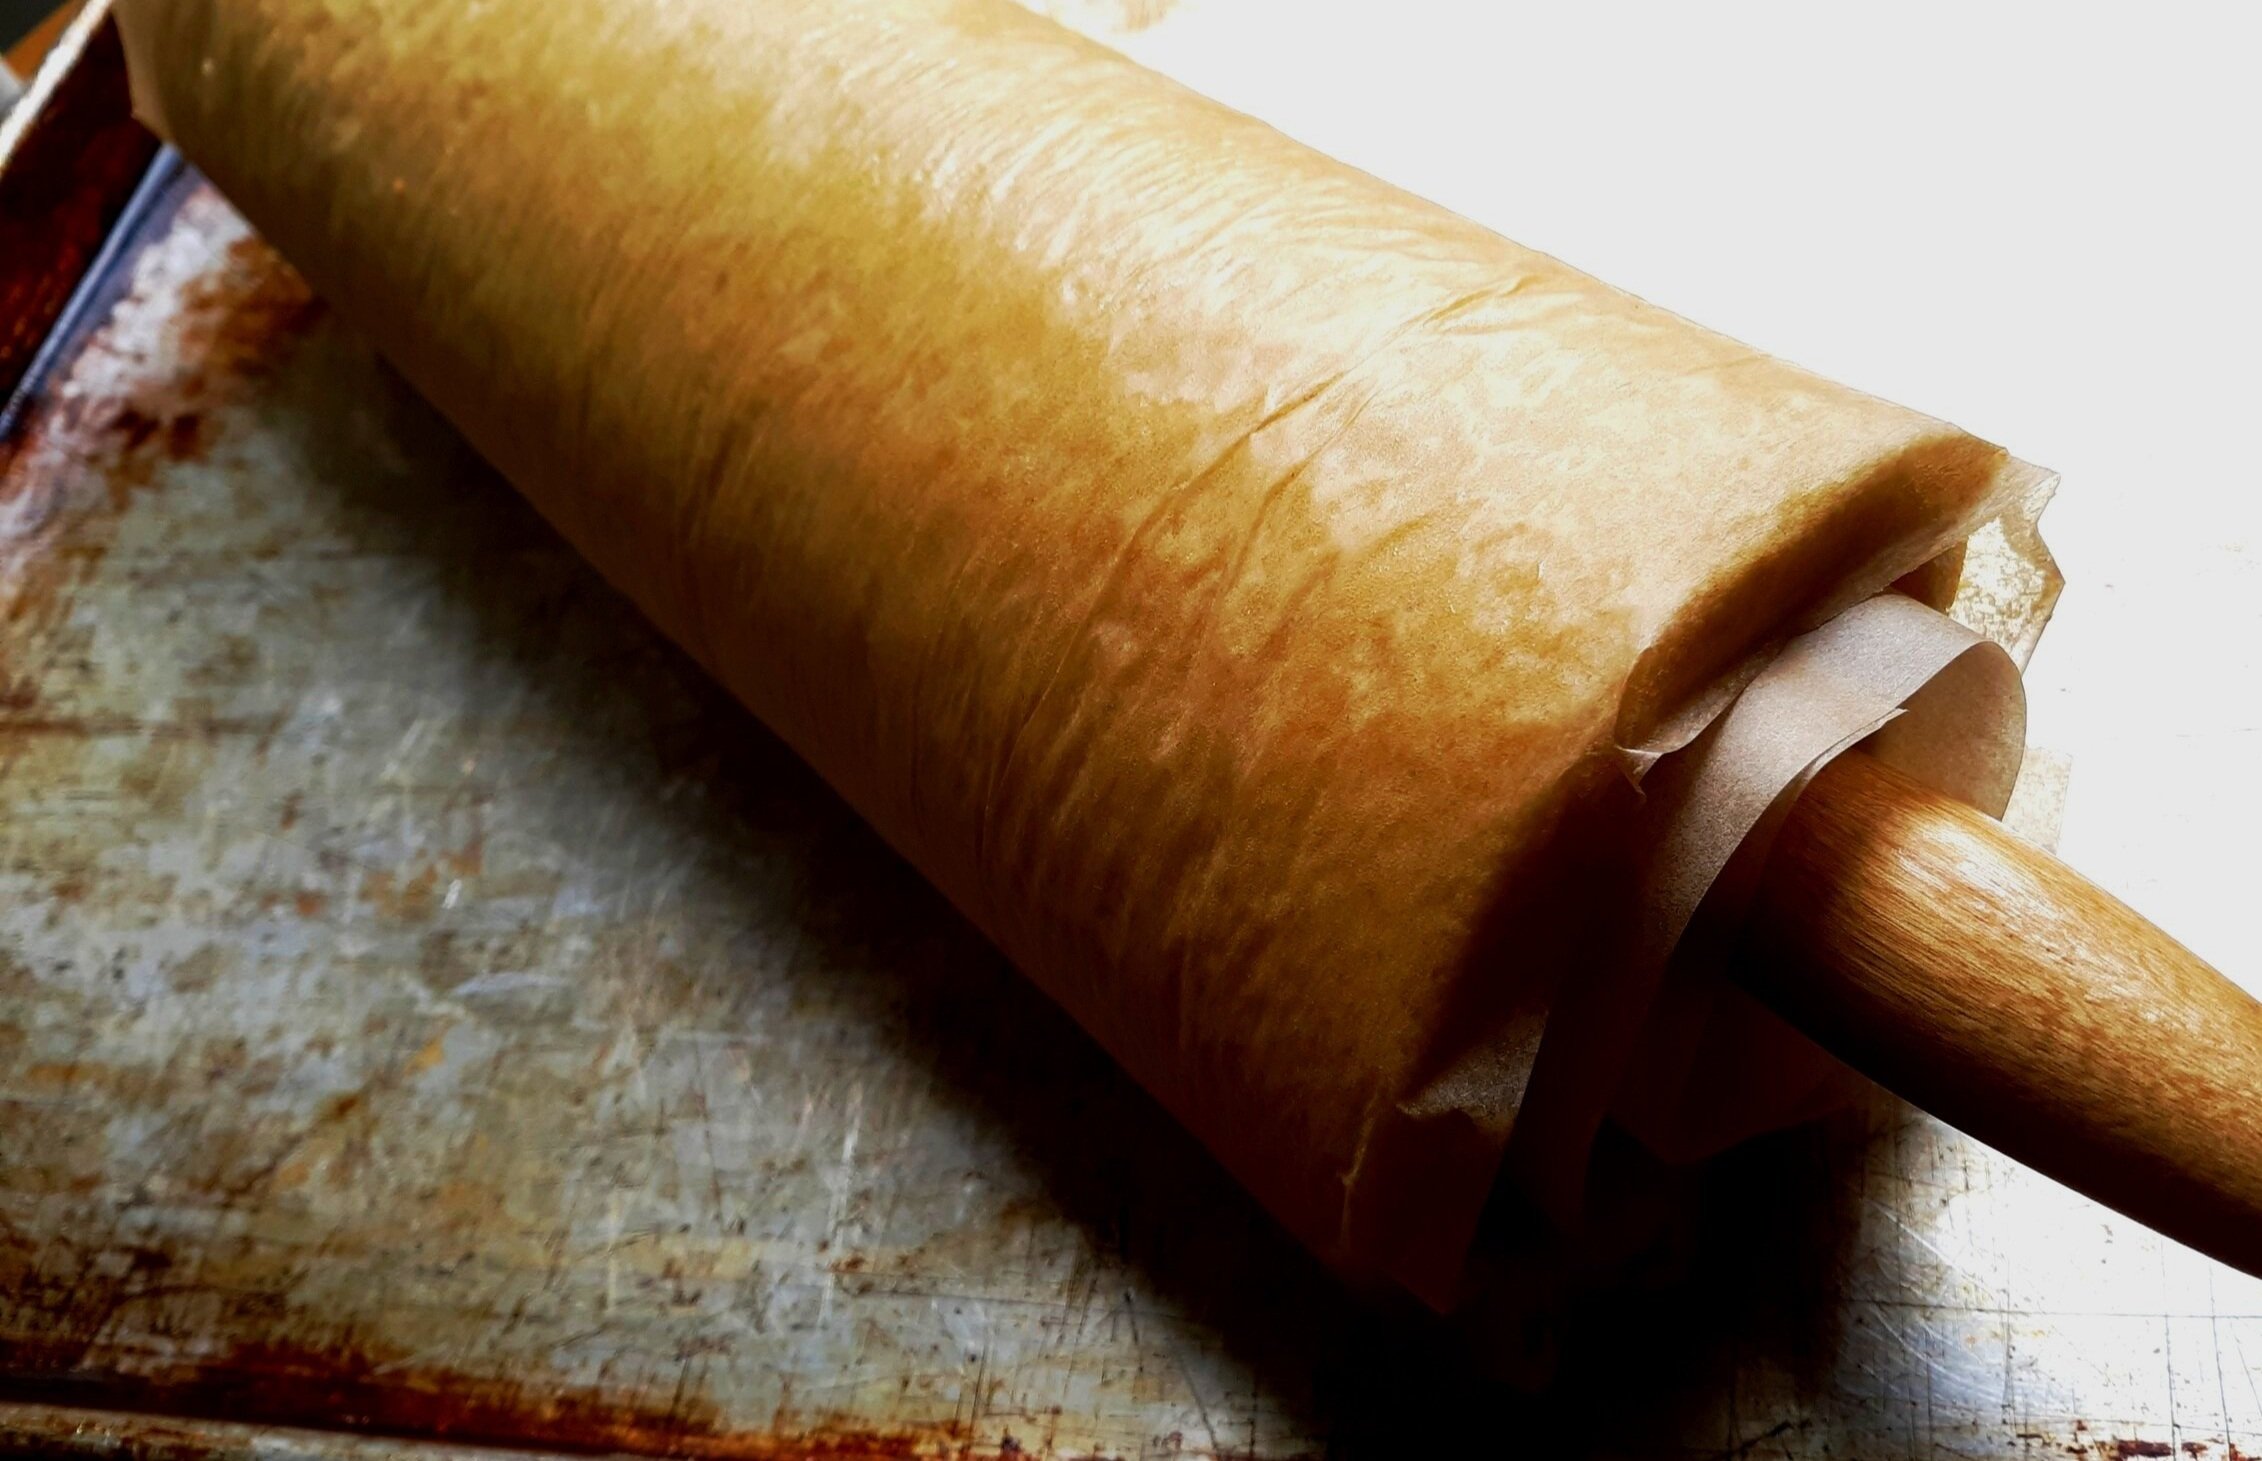
Roll the cooked and slightly cooled cake around a rolling pin with the lining paper still on and let cool completely, about 20 minutes. Then unroll.

Mound the strawberry ice cream, on top of vanilla ice cream along one long edge of the cake. Using lining paper for support, lift the long edge up and roll the cake up and over the filling to the other side, peeling back the lining paper as you roll. The strawberry ice cream will create the center of the roll.

Slice cake roll into generous sized slices to serve and spoon on raspberry puree, garnished with a fresh raspberry or two.
PERSNICKETY NOTES:
**Food Coloring Dyes: If using gel, dip a toothpick into the dye and add it to your mixture then repeat process until you reach your desired color. The color will intensify as the batter sits and cooks, so stop with just a shade lighter than you would like your result to be. If using regular liquid cooking dyes, it is hard to achieve an intense color but just add drops of the dye until you achieve your desired intensity.
**At times I find it difficult to peel off the baking paper from the cooked cake. A couple of tips below:
-Be sure you amply spray the parchment/waxed paper you turn your cake onto out of the baking pan and sprinkle with a dusting of powdered sugar so cake is less likely to stick. If using a cotton towel, heavily dust with powdered sugar.
-Do not let your cake rest more than 10 minutes before rolling it. Some people find it is less likely to crack if you use the rolling pin method which gives the rolled cake more support.
However, your cake may crack as you roll or unroll inspite of what you do, but nothing that a little sprinkling of powdered sugar or extra raspberry puree can’t hide! Take a deep breath and proceed being patient and finding joy in creation!